外观
后端快速启动
准备开发环境
介绍
准备后端开发环境流程包括
- 安装Python
- 安装MYSQL
- 安装Redis
- 安装VSCode
- 安装Git工具
- 安装DBeaver
- 安装Another Redis Desktop Manager
下面以Windows环境进行说明
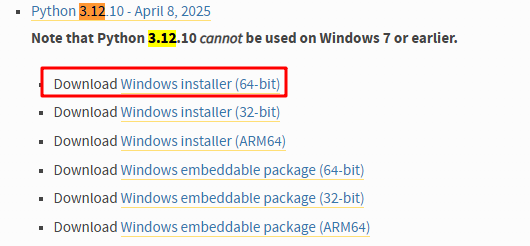
安装Python
Python推荐3.12.10版本,下载地址
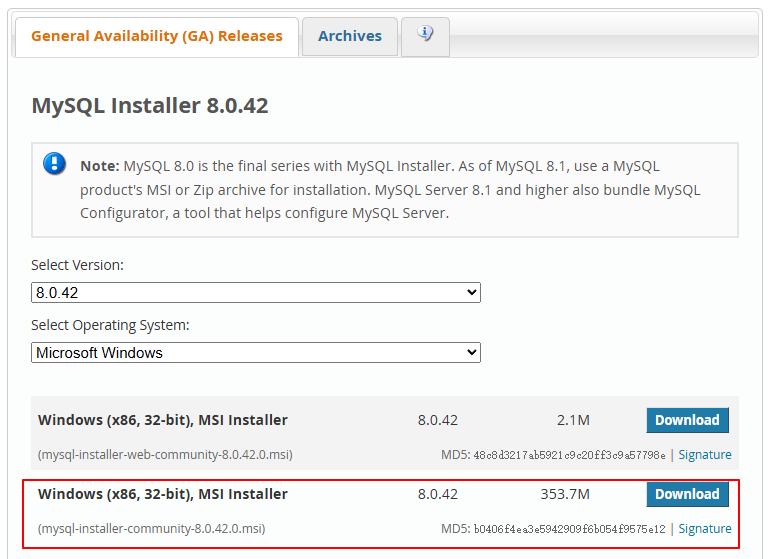
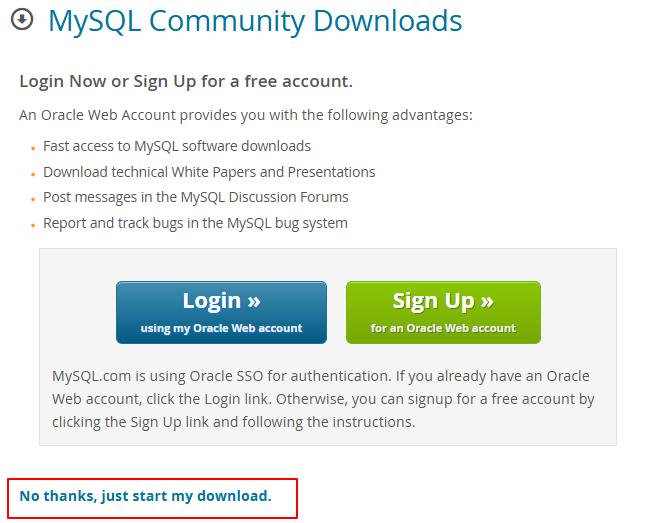
安装MySQL
MySQL推荐8.0版本,下载地址
修改root密码步骤:
- 开始菜单——MySQL 8.0 Command Line Client
- 运行下面命令:将
new_password替换为你的强密码
bash
ALTER USER 'root'@'localhost' IDENTIFIED BY 'new_password';安装Redis
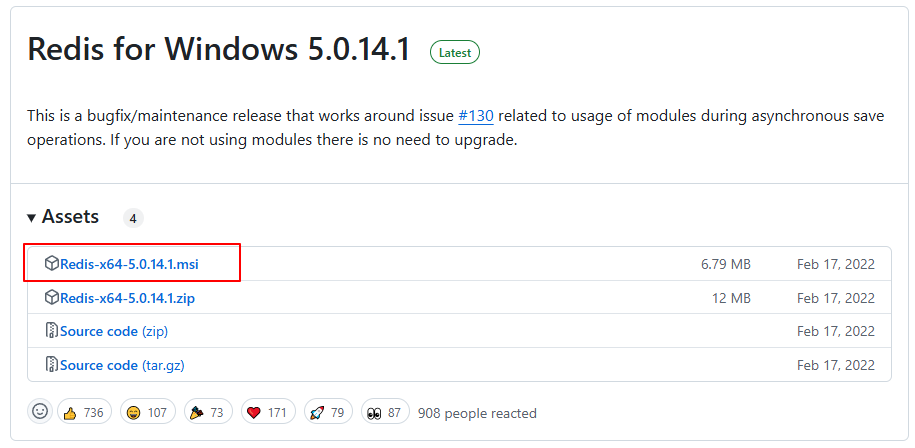
Redis 推荐6版本,但由于Windows上只有5版本,这里安装5版本。下载地址
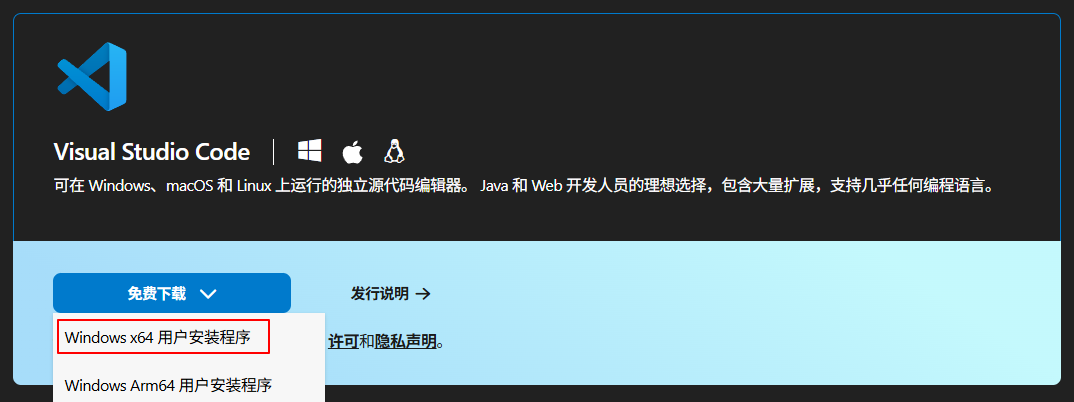
安装VSCode
VSCode安装插件
- Chinese (Simplified) (简体中文) Language Pack for Visual Studio Code
- Python
- Pylance
- Black Formatter :代码格式化工具
- 千文 或 CodeBuddy:也可选择自己熟悉的AI辅助编码工具
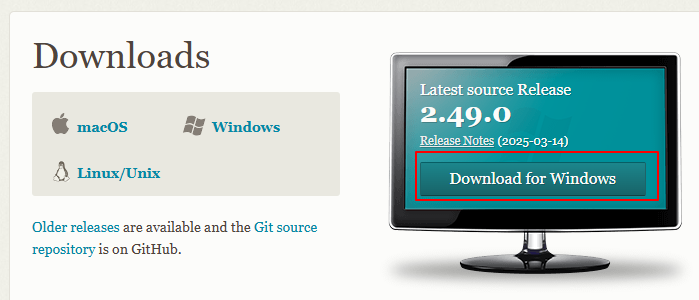
安装Git工具
配置Git工具
安装后首次使用 Git 时,需要配置用户信息,这些信息会记录在提交历史中。
打开Git Bash,执行下面命令
sh# 按实际填写name和email git config --global user.name "Your Name" git config --global user.email "your_email@example.com" # 记住密码 git config --global credential.helper store # 关闭路径转义,用于正确显示中文 git config --global core.quotepath false # 禁用换行符自动转换 git config --global core.autocrlf false # 查看全局配置 git config --global --list
若报错***fatal: unable to access ... getaddrinfo() thread failed to start\***,请关闭防火墙
shell
# Windows PowerShell(管理员)
netsh advfirewall set allprofiles state off
安装DBeaver
DBeaver是一个开源的数据库管理工具,支持主流数据库系统(如 MySQL等),也可以使用Navicat。下载地址
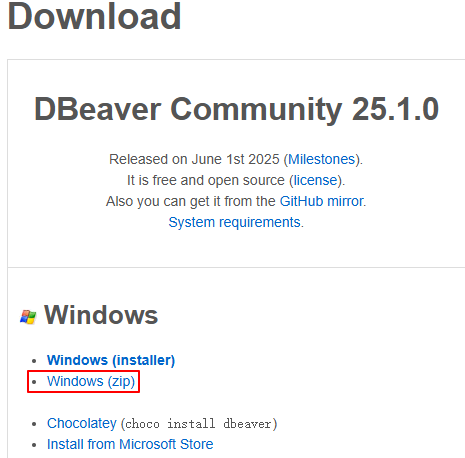
解压即可使用。
安装Another Redis Desktop Manager
Another Redis Desktop Manager是一个Redis的图形管理界面工具。下载地址
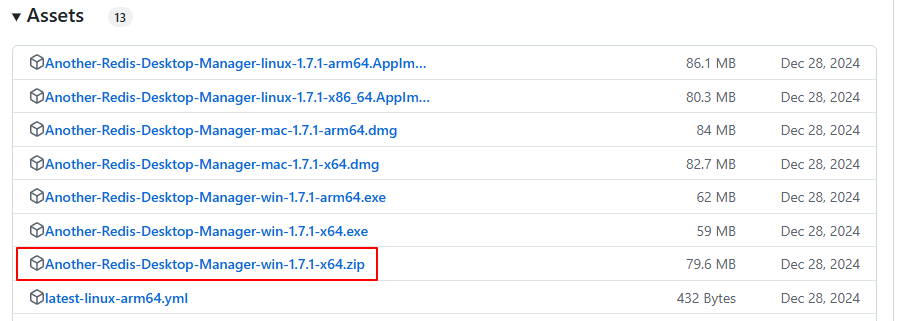
解压即可使用。
配置与启动
下载源码
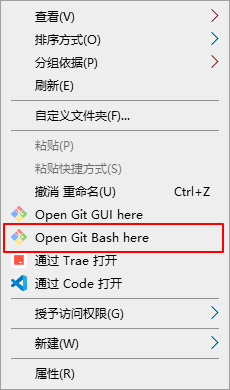
下载解压源码my-rag。进入该文件夹,右击选择“Open Git Bash Here”
在Git Bash中,执行下面命令
sh
# 初始化python虚拟环境
python -m venv venv
创建数据库
创建数据库步骤
- 打开DBeaver,点击菜单栏的“数据库——新建数据库连接”,数据库类型选择MySQL,下一步
- 填写服务器地址、端口、用户名和密码。点击完成。

- 成功连接后,右击数据库,选择“新建数据库”。填写数据名等信息。
sh
数据库名称:my-rag
字符集:utf8mb4
排序规则:utf8mb4_general_ci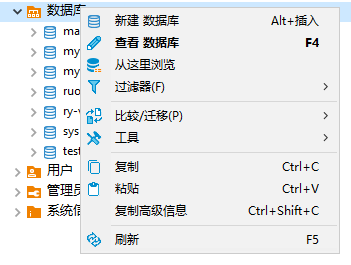
修改配置文件
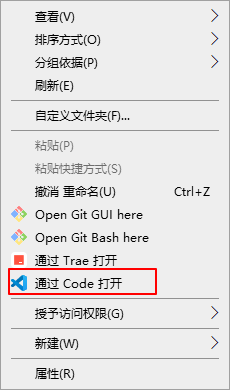
使用VSCode打开项目:进入my-rag文件夹,右击选择“通过Code打开”
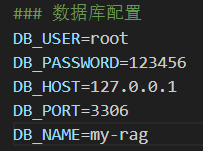
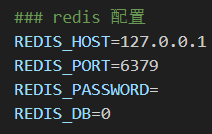
项目配置文件:.env.dev
- 数据库配置:填写实际的地址、端口、用户名和密码。
- Redis配置:填写实际的地址、密码(可选)。
安装依赖与初始化数据
在VSCode中,点击查看——终端,打开终端。
- 在VSCode中,点击打开任意一个Python文件,例如
main.py - 观察VSCode右下角,确认处于Python虚拟环境中
- 在终端中执行下面命令
sh
python -m pip install -U pip
# 安装依赖
pip install -r requirements.txt -i https://mirrors.aliyun.com/pypi/simple --trusted-host=mirrors.aliyun.com
# 或者 pip install -r requirements.txt -i https://pypi.tuna.tsinghua.edu.cn/simple --trusted-host pypi.tuna.tsinghua.edu.cn
启动项目
打开VSCode终端,进入项目的根目录,执行下面命令
sh
python main.py

### 输出下面信息
(venv) PS D:\workspace_ai\my-rag> python main.py
INFO:     Will watch for changes in these directories: ['D:\\workspace_ai\\my-rag']
INFO:     Uvicorn running on http://0.0.0.0:8000 (Press CTRL+C to quit)
INFO:     Started reloader process [26220] using StatReload
INFO:     Started server process [21440]
INFO:     Waiting for application startup.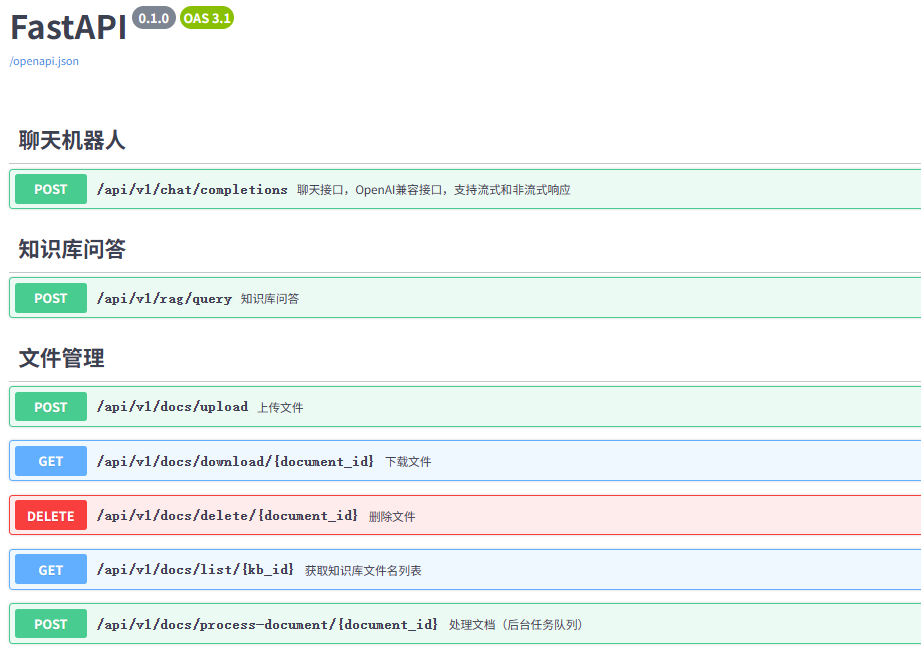
INFO: Application startup complete.打开浏览器,输出后端IP地址和端口。例如:http://127.0.0.1:8000/docs
如果启动成功,能看到Swagger的API界面。